Banner

Banner
My Rover as it goes airborne cresting a hill on Eloo

Tuesday, April 29, 2014

The Trouble With The Tiny Titan II

In the last post I introduced the Tiny Titan II. It is a highly successful design, and that is the trouble with the Tiny Titan II. You want to go on a round trip to Mun? Sure, no problem. Minmus and back? Piece of cake.

How is that a problem? Well, in Kerbal Space Program everything seems impossible until you do it. Once you do something, you begin to think it was easy. When you are convinced it was easy, you start wondering how much further out you could push into space. After all there is nothing that can't be solved by adding moar boosters!

Once you start thinking all crazy like that, the next thing you know you are on your way to Duna in your Mun rocket! But, but, that's impossible. You'll never make it....

Tiny Titan II Burning For Duna

You'll never make it until you do! Yeah, that is the Tiny Titan II in orbit around Duna. I read Duna has an atmosphere. It is thin but they claim you can use chutes when landing. Chutes don't need fuel. Landing should be fuel efficient, almost free. Hold on, I'm going in...

Tiny Titan II Orbiting Duna

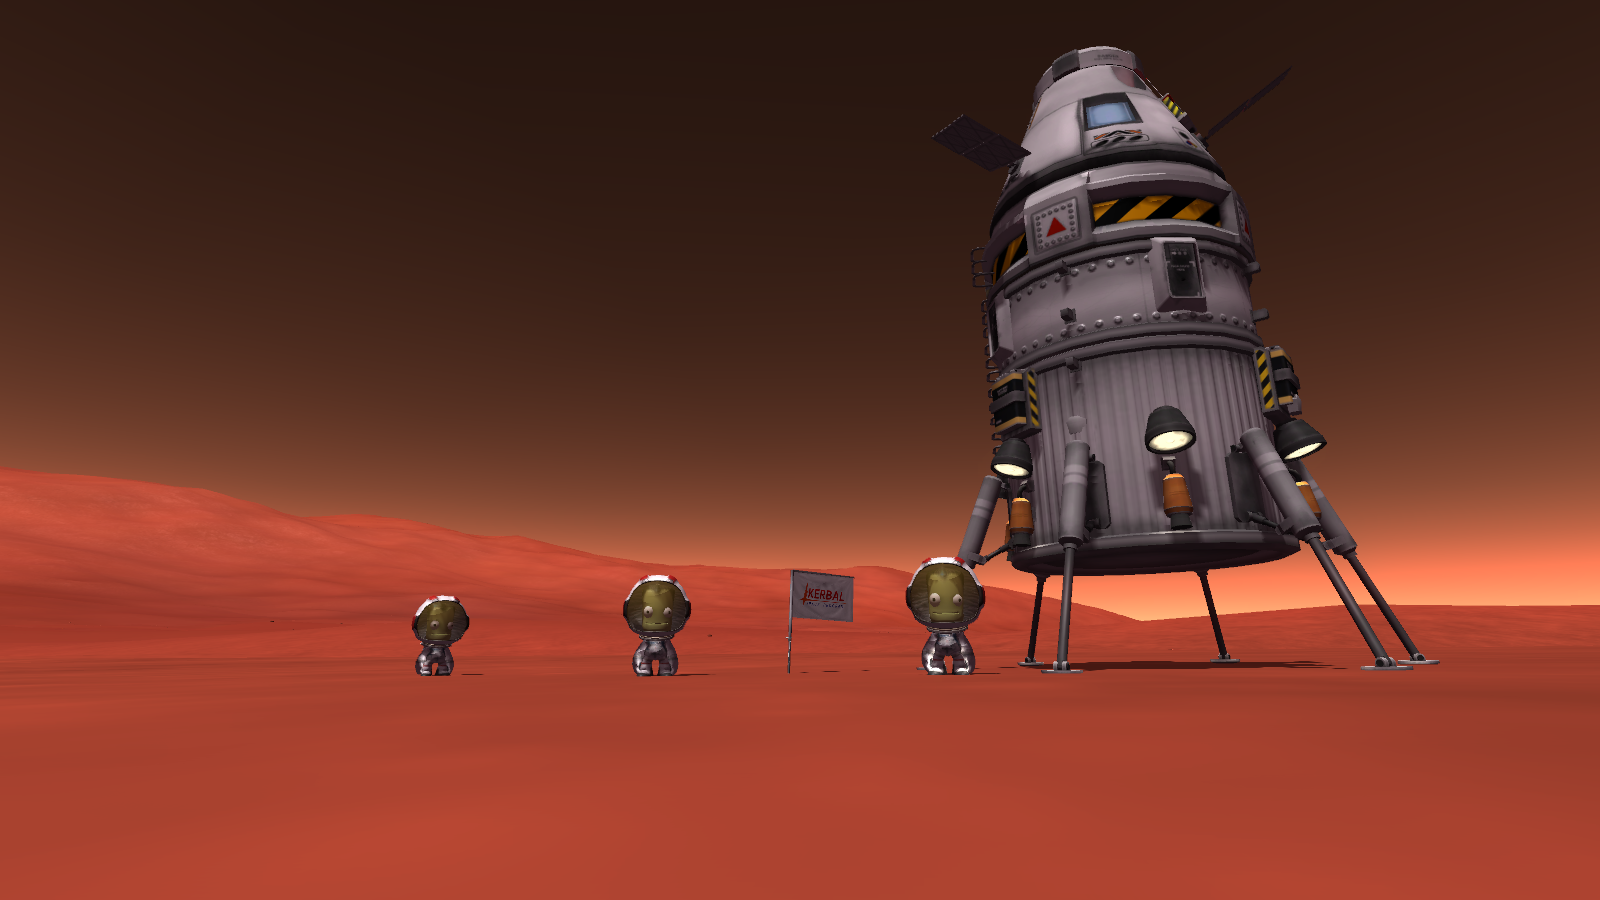
What do you know, I landed on Duna with my Mun lander - the Tiny Titan II - Ta Daa!
That wasn't so bad. In fact it was kind of awesome. Look at it. Duna is beautiful.  

Tiny Titan II On Duna

There is just this one tiny little problem. It took way more fuel than I thought.
Now the tank is kind of empty. 
You know what that means don't you? Everybody's going to die? No....

Rescue Mission!

Stay tuned. The Kerbal Space Program is about to get real interesting.


Monday, April 28, 2014

Tiny Titan II

The failure of the original Tiny Titan to return home from a Mun or Minmus mission, led to the creation of the Mun Rescue craft. With this it was possible to recover the stranded crews, yes plural. Of course this triumph demanded it was time to move forward with the space program. The next phase was the design of the highly successful Tiny Titan II. 

Tiny Titan II
This craft was more than capable of reaching Mun or Minmus and returning the crew safely home. Following is a record of one of its many missions to Mun. The first screenshot shows the ship in orbit with Kerbol and Mun visible in the picture. Note the ejected and not seen lift stage propelled the rocket to 50,000 m. Its Mainsail engines probably could have been exchanged for Skipper engines. Orbit was completed and circularized at 80 km using the orbitor stage. 

Tiny Titan II In Orbit

The orbitor stage also served as transfer stage. The Skipper engine worked its wonders even though a smaller engine might have been a better choice.

Burning For Mun

Kerbol rise over Mun as the Tiny Titan II circularizes. The transfer stage breathes its last at the beginning of the landing phase. Often I eject it with a small amount of fuel to keep landing a little less hectic.

Circularizing

Descending on Mun with Kerbin hanging above the horizon.

Mun Descent
Tiny Titan II on Mun with nearly full tank of fuel for the return trip home.

Tiny Titan II On Mun

Tiny Titan II lifts off Mun and heads for orbit.

Munar Ascent

The burn for home. I imagine all of KSP cheered when they realized the crew had the fuel to make it.

Homeward Bound

Glowing red during reentry. It looks more spectacular than normal because Jeb forgot to raise the landing struts. Yeah, I always blame him when I forget something on the to do list.

Reentry

As the ship gets closer it begins to glow white. You can see KSP below.

Glowing

That's no comet. A side shot of the white glow. 

Tiny Titan II Imitating A Comet

And the journey comes safely to an end as the chute fills with air. The last of the fuel is used in landing.

Back At The Space Center

_______________________

Below for the record is the Tiny Titan II building specs:

Lift Stage
The outer ring is 8 Mainsail engines, each with a Rockomax X200-32 and Rockomax X200-16 fuel tanks. They utilize asparagus staging which drops two assemblies at a time. Each assembly is mounted on a Structural Pylon for extra clearance and a TT-70 radial decoupler. Everything is well strutted. The inner engine that also fires at launch is a Mainsail on a Rockomax X200-32 fuel tank.

Orbit / Transfer / Circularization Stage
A Rockomax Brand Decoupler ejects the Lift stage before firing the Rockomax Skipper engine mounted on 3 Rockomax X200-16 tanks. Stabilization is helped with 4 AV-R8 winglets.

Lander / Return Stage
First a Rockomax Brand Decoupler drops the Orbitor Stage. This stage is built around a Rockomax X200-16 and Rockomax X200-8 fuel tank. To the tanks are added 6 Rockomax 24-77 Engines, 6 LT-1 Landing Struts, 6 Illuminator Mk1 lights, 3 Z-400 Rechargeable batteries, ladder rings, a FL-R1 RCS Fuel Tank, and 4 RV-105 RCS Thruster Blocks.

Rentry Stage
Starting with a Rockomax Brand Decoupler. This is only used when there is not enough fuel to land with the Return Stage or when landing in water. The rest of the stage is a Mk1-2 Command Pod, 3 OX-4W 2x3 Photovoltaic Panels, an Inline Advanced Stabilizer, and a Mk16-XL Parachute.


Sunday, April 27, 2014

Mun Rescue

Mun Rescue
When I flew the early Tiny Titan missions, many, many (many), Kerbals were lost in fiery landing attempts. All in the name of science. Once I successfully landed, I created a whole new set of problems in Kerbal Space Program. I used too much fuel getting to the surface, so there was not enough to get back in orbit.

Turns out the Tiny Titan did not have enough fuel to return from Munar orbit anyway. A fact that escaped me at the time. What I knew was, there were three Kerbals stranded on Mun and another three on Minmus because someone (me) launched without considering the consequences.

Quickly adopting a no Kerbal left behind policy, I took it as an opportunity to develop and launch a rescue craft. I did not know at the time that if you load the ship from file on the launchpad instead of first loading it in VAB that you can choose the crew or even fly with a partial crew or no crew at all. I decided to design an unmanned craft that could carry the stranded crew back to Kerbin. Since every craft in unmodded KSP must start with a pod, I chose to use a remote guidance unit and the hitchhiker storage container.

I still had to deal with the lack of fuel issue. I had read the atomic engines were very fuel efficient but using one with landing struts proved problematic. That is when it occurred to me to continue to use side mounted engines. I used three for balance reasons. Admittedly it is overbuilt but desperate times and all you know. The lift stages, I think, are the same as the Tiny Titan.

Minmus Rescue
With the aid of this design, and Mechjeb to land along side the stranded vessels, I was able to successfully bring the trapped crews on Mun and Minmus home safely. A word of warning about MechJeb used in a rescue mission. Often it works too well and the rescue ship crashes into the stranded vessel as seen in this screen shot (note these are different ships than the Tiny Titan and Mun Rescue - I repeat my mistakes, a lot). So I had to send another rescue mission. What I finally did to solve the problem was to slightly alter the landing coordinates of the stranded ship, as provided by MechJeb, when picking the landing spot for the rescue ship.

One thing I noticed while writing this post is during original design I forgot to add thrusters and RCS propellant to the craft. Had I run out of fuel on the liquid engines before getting a periapsis well below the Kerbin atmosphere, it would have made getting home very difficult but it turns out, not impossible. Jebediah can literally get out and push, using his EVA thruster pack, to move the ship into a reentry orbit. If you watch your propellant levels, when they get low. just board the pod and you will get a full charge to try again.

-----------

Below are the design specs for the Mun Rescue craft for posterity:

Lift Stage:
7 engines fire at launch. the outer ring uses 6 Mainsail engines each with a Rockomax X200-32 tank and a Rockomax X200-16 tank. Lower tanks have AV-T1 Winglet. This tank engine combo is mounted on TT-70 radial decouplers angled 5 degrees. It is all well strutted. Asparagus staging is used to drop 2 opposite side tanks at once. The outer ring is centered around 1 Mainsail with a Rockomax X200-32 tank and Rockomax X200-16 tank. The engines are over powered. Skippers might have been better.

Orbit Stage:
TR-18A Stack Decoupler to eject the Lift stage. Then 6 RT-10 Solid Fuel Boosters on TT-70 Radial Decouplers angled 5 degrees. 3 fire at a time. Once solid boosters are ejected the center engine fires - Rockomax Skipper with 2 Rockomax X200-16 tanks and AV-T1 Winglets

Transfer / Lander Stage:
TR-18A Stack Decoupler to eject the orbit stage. The orbit stage actually begins the transfer burn.
3 LV-N Atomic Rocket Motors with a double stack of FL-T200 Fuel Tanks. Why not one bigger tank? It kind of grew with each test. The atomic engine/tanks are mounted on Modular Girder Segments and secured with struts.

Lander / Return Stage:
3 TT-38K Decouplers are used to eject the atomic engines once emptied during moon ascent.
The stage is built around a Rockomax X200-16 Fuel Tank below a Rockomax X200-8 fuel tank.
Around the bottom of the lower tank is mounted 6 Modular Girder Segments with LT-1 Landing Struts. This is further strengthened with struts. Also mounted are 6 Illuminator Mk1 lights, and 3 Z-400 Rechargeable batteries, along with access steps. The return power comes from 6 Rockomax 24-77 Engines.

Reentry Stage:
TR-18A Stack Decoupler is used to eject the lander / return stage. Above this in order from bottom to top are an Advanced S.A.S. Module, a RC-L01 Remote Guidance Unit (the pod), a PPD-10 Hitchhiker Storage Container with room for 4 stranded space travelers.  Also mounted to the can are 3 OX-4W 2x3 Photovoltaic Panels, and 3 Mk2-R Radial Mount Parachutes. On top of the can is 1 Mk16-XL Parachute.

Thursday, April 24, 2014

MechJeb Is Your Friend

MechJeb
One of the cool things about Kerbal Space Program is that there are many free mods available that, once installed in the basic program, change the way the game looks and works. One of the most popular mods is MechJeb, short for Mechanical Jebediah. Basically this mod works as an autopilot feature. The very fact that MechJeb will fly your ship for you has caused some purists to cry "Foul!" and "Cheat". I have a different opinion, MechJeb is your friend.

MechJeb can control your ship from launchpad to splashdown and all points in between. Actually, it can even help you in designing your craft, although I have never tried to figure out how to use it in this manner.

Can't get into space or circularize your orbit at 80,000 m? MechJeb.  Can't create nodes to transfer to Mun and circularize around it at 8,000 m? MechJeb. Can't land on Mun? MechJeb. Want to land your craft at the Kerbal Space Center? Yep, MechJeb. Given all it can do you can see why some people might complain.

But no matter how cool KSP is, it's just a game. It is not real life. If you are frustrated at your own lack of ability this little add on can help you enjoy the program. Interestingly, in real life NASA does use computer programs to perform these same functions. The astronauts may need to know how to perform the operations in case something goes wrong but the computer program is going to do most of the flying. In fact there are aircraft that can't be flown by pilots without computers. My point? Don't let the complainers who don't need help stop you from using MechJeb.

A lot of my joy with Kerbal Space Program has been in the design and planning of the mission and then seeing it carried out. When things go horribly wrong (often) I enjoy learning from my mistakes, correcting them, and then sending a rescue mission. I don't need to fly by the seat of my pants at every move to have fun. That said, one of the amazing things about MechJeb is watching how it handles a maneuver. It is almost like having someone sit beside you and teach you how to fly. I told you, MechJeb is your friend.

Without the add on, I can put a rocket in a circular orbit and create the nodes to transfer to Mun and beyond. I can set a lander on Minmus by myself. I can bring Jebediah home safely to Kerbin. A lot of what I can do now, I owe to MechJeb for showing me how it is done.

Another benefit of MechJeb is after you have launched successfully a few hundred times, it gets kind of monotonous. This is a great time and place for MechJeb. It doesn't mind doing the tedious work.

Now don't leave here thinking everything will be roses and sunshine and all your space maneuvers will work perfectly because of this mod. They won't. The truth is just as Kerbals are noted for their courage and stupidity, MechJeb, for all its merits, tends to stop working or not work as expected - often. Unless you really enjoy 'Revert To Launch', you need to learn by observing what MechJeb is doing when things go correctly, so you are prepared to fly manually when everything goes terribly wrong. You know, just a normal day in the Kerbal Space Program.

MechJeb is available for download at Kerbal Space Port

Wednesday, April 23, 2014

How Do I Get In Orbit?

So, you have been playing Kerbal Space Program for a while and your best attempts at orbiting the home planet either A) don't leave the launchpad  B) veer wildly off course or explode shortly after launch  C) fall short of space tumbling into the ocean  D) promptly leave Kerbin never to be seen again.

You have seen pictures and videos of others doing incredible things in space with this game. You want to believe it can be done. With the next attempt you strap on more boosters and you still fail. What are you doing wrong, and just how do you get Jebediah Kermin in orbit?

I have not been playing long myself. I hope my non-technical approach will help you achieve orbit and start enjoying the program more.

First thing, quit trying to build the Apollo moon mission rockets. Forget the motto of Kerbal players everywhere - Moar Boosters! No, more is not better. At least not at first. Think small.

For some ship building ideas read my Humble Beginnings post or my post The Orbitor Series. All of those ships, even the simple ones are over designed. Below I will describe the smallest ship I have been able to put in orbit. With a little patience and practice you can as well.
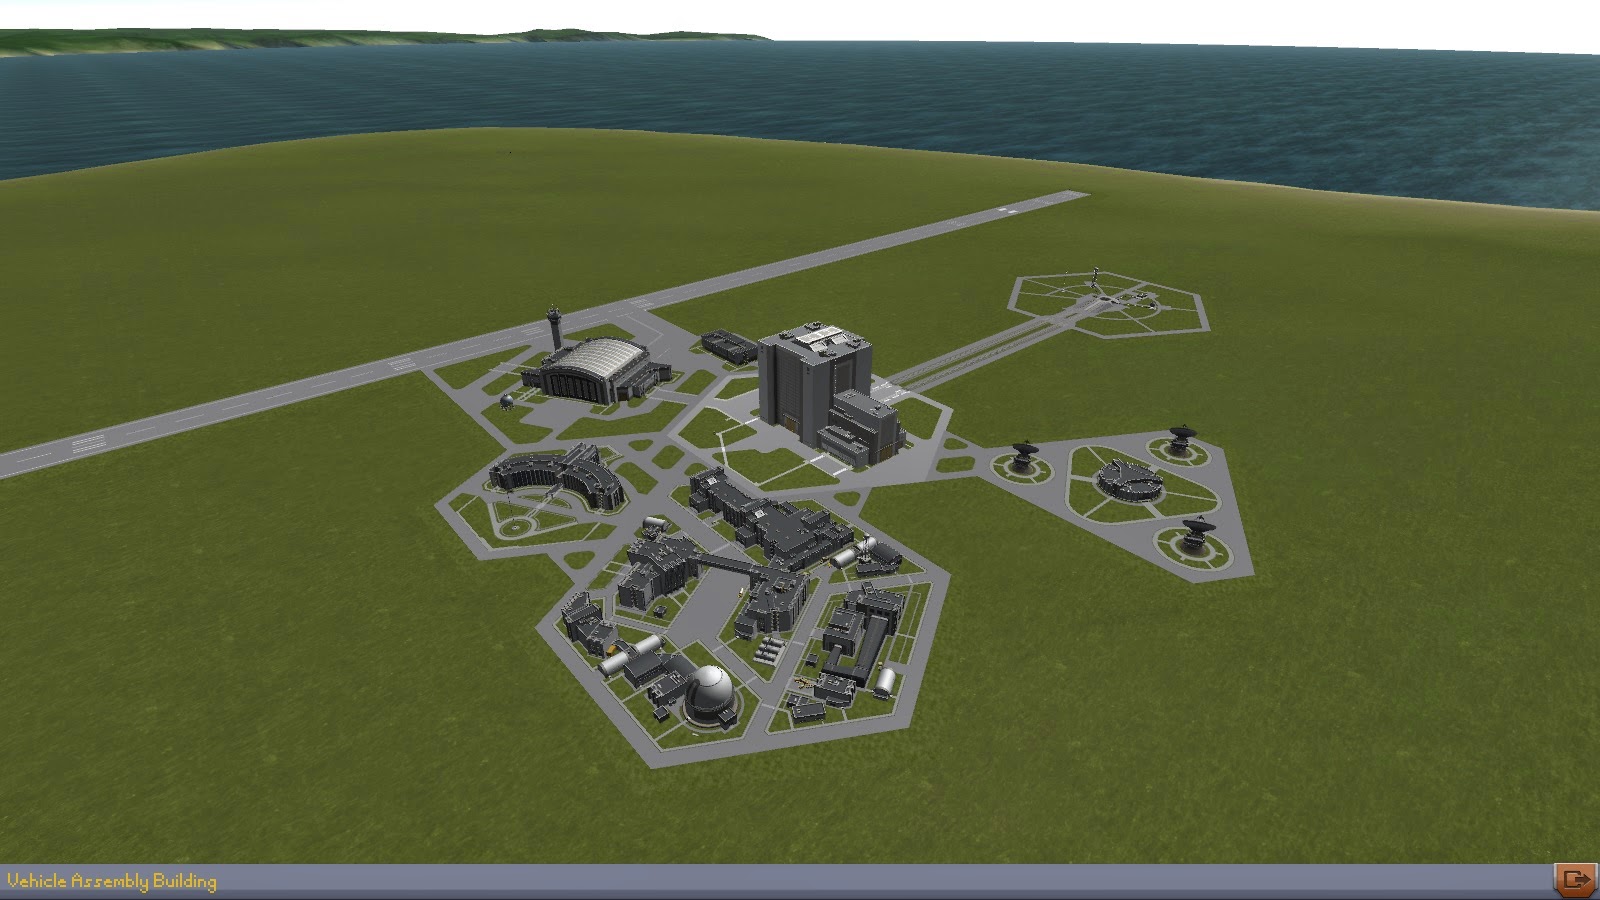

Vehicle Assembly Building

In sandbox mode enter the Vehicle Assembly Building (VAB) the big building at the center of the KSP complex. On the first tab (Pods), select the MK1 Command Pod. Now go immediately to the 2nd page of the Utility tab and select the MK16 parachute. Attach it to the top of the pod. Be prepared and optimistic!

From the 2nd page of Structural tab grab a TR-18A Decoupler and add it below your command pod. To this, from the 1st page of the Propulsion tab add a FL-T400 tank and then a FL-909 liquid fuel engine.

Again from the 2nd page of the Structural tab add a TR-18A Decoupler to the bottom of the FL-909. Notice when you do, the decoupler expands and covers the engine above.

Now from the 2nd page of the Propulsion tab add a FL-T800 tank, and from the 1st page of the Propulsion tab attach a LV-T45  liquid fuel engine.

You are done building! This is all you need to achieve orbit. Seriously.
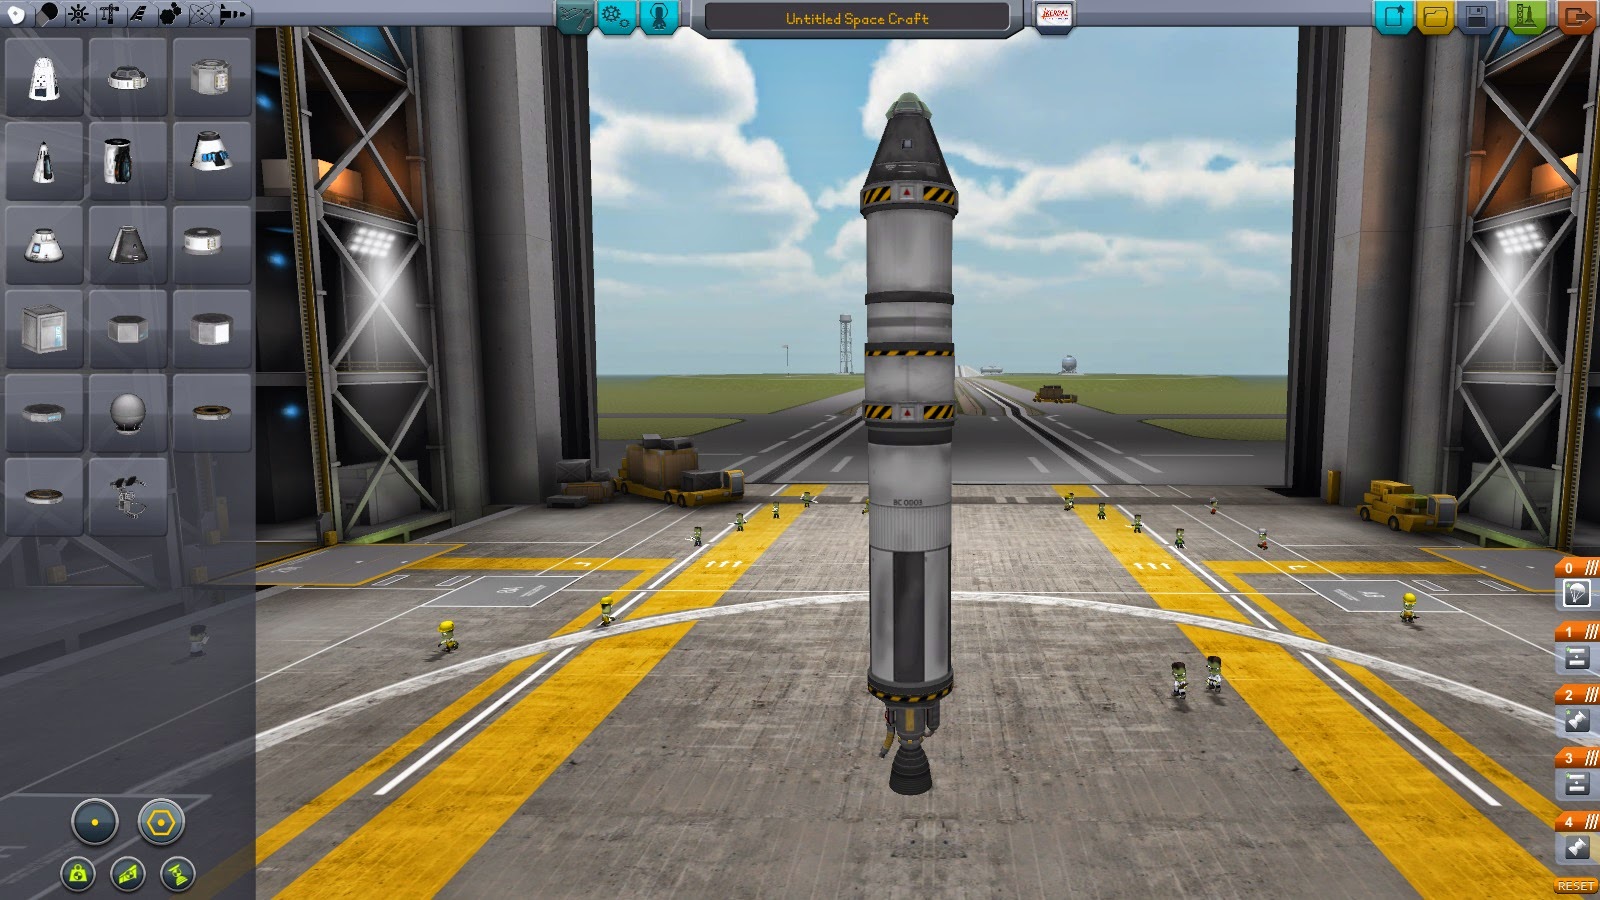
Rocket Assembly


If you like you can add 3 or 4 tail fins equally spaced for added stability but they are not necessary. You could also use launchpad stabilization enhancers (LSE) but again it will work without them. If you use fins and LSE make sure you move the LSE so the fins will clear them when launched.

Before going to the launchpad check your staging tree on the right side. The best way to check this is place your mouse pointer at the top of your ship and work your way down. At the top is the chute. If its not at the top, drag it there. Next on your tree should be the upper decoupler. In the stage below it the FL-909. Next stage is the lower decoupler and finally the LV-T45. If you are using the launchpad stabilization enhancers, they go in the same stage as the LV-T45.

You've run though the check list and made any necessary corrections. Now save your ship for next time and let's go to the launchpad.
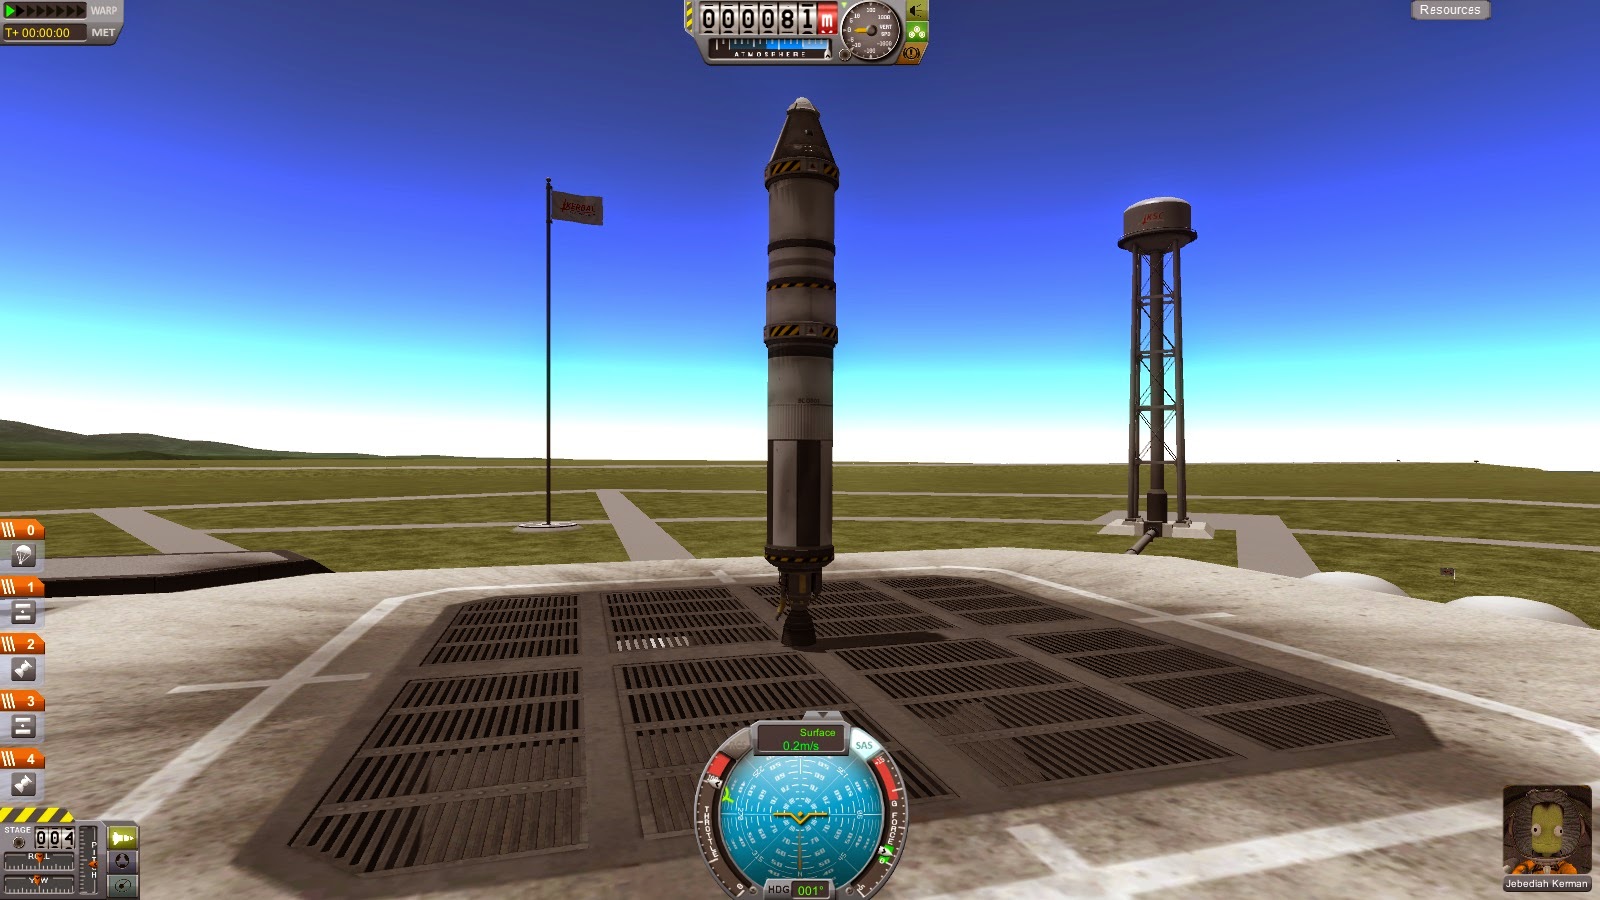


Ready For Launch

Once you load your rocket on the launchpad - don't touch anything. Your Kerbalnaut will appear in the lower right hand corner. Moments later physics will be applied and things will get a little wonky for a moment. Wait until the program calms down.

The first thing to do is notice the Navball at the center bottom. It shows all blue with a red line going from the center downward. This marks north. The white line from the center going towards the right marks east. That is the direction we will eventually be moving. Also notice the yellow V-shaped marker. The dot in the center tells you which direction your rocket is pointed. It's kind of important to know.

Now press the "T" key. This will turn on S.A.S. which helps control your ship. S.A.S. is built into the pods so it is not necessary to add a separate unit.

Press and hold SHIFT. Notice the throttle marker along the left edge of the Navball begins to climb. Once it reaches the top you can release SHIFT. You can lower the throttle with CTRL.

When you press the SPACEBAR the LV-T45 engine will fire and you are one your way.

Using the WASD keys try to keep the nose of your craft pointed straight up (Centered on the Navball).

At the top of your screen is a readout of how high you are above sea level. When it reads 7,000 (some say 10,000 is better - but I'm giving the instructions here) press the D key to rotate your nose over about 30 degrees towards the east. The line halfway between the blue center and the brown line representing the horizon (while launching) is 45 degrees. I usually put the right end of the yellow line on the 45 and that makes the center marker about 30.

If your ship started spinning before you reached 7000 you will need to orient what direction is east from the red line. You may have to use a combination of keys to point eastward 30. If you notice your ship slowly starting to spin, the Q and E keys can be used to try and control it.

Now watch your Navball. The prograde marker will begin to move eastward. As it catches up with you direct your nose marker to follow just behind the circle of the prograde marker. This is important as it keeps your nose up just a little so you keep climbing.

When your first stage engine stops at around 12,000 m press the SPACEBAR to jettison the stage along with the decoupler. Press SPACEBAR again to fire the FL-909.

Now it gets a little more tricky. At around 30,000 m switch over to map view by pressing M. I usually rotate Kerbin so the the trajectory is at the top of the screen. Make sure your Navball is visible. You may have to click the little marker at the bottom center to bring it up. While watching that you are still lined up just behind the prograde marker, place your mouse pointer over the Apoapsis marker on the trajectory. You are waiting for it to read at least 70,000 m. As it approaches you can throttle down with CTRL or wait and simply hit X at 70,000 m to kill the engine.

When you reach the apoapsis at 70,000 m you are momentarily in space but you are not in orbit. We still have to circularize or the ship will simply fall back to Kerbin. Also note, if you did not cut your engines as directed, you may well find yourself orbiting Kerbin's sun. Just saying.

Now point your nose directly on the line separating blue and brown. This marks the horizon. Keep the nose pointed this direction as your rocket coasts to apoapsis. You may have to make adjustments. As you reach apoapsis, or even a few seconds before, power up. Watch your trajectory move and grow around the planet. When the periapsis rises from the backside of the planet throttle way down. When the apoapsis and periapsis both begin to move hit X. If you have done this correctly, congratulations, you are in orbit. It should be fairly circular. If not it will get closer with practice.

You can leave map view by pressing M again and enjoy the view.

To return home, spin the rocket around and point it in retrogade. The retrograde marker is a round yellow circle with three lines angled out around the circle. Go to map view and light the engine. Watch as your orbit path grows smaller until it is below ground level. Once this happens feel free to jettison the engine. You are on your way home.

As you enter the atmosphere keep your ship pointed retrograde. At about 30,000 meters your craft will begin to flame to simulate reentry. Once the red flames pass watch your speed. When it is 200 m/s or less you can press SPACEBAR to deploy your parachute. If you are going faster it may rip away - not good. When the pod is 500 m above the ground it will fully open and you will land gently.

This was longer than I intended but I hope it helps.

Sunday, April 20, 2014

Out Of Fuel?

This every happen to you? You are flying a perfect mission in Kerbal Space Program. You even land on Mun without exploding or tipping over.

Perfect Mun Landing

Of course you wasted a little (OK a lot) of fuel with that perfect landing. But, what are you going to do? Jeb has to get home. So, you launch into a stable orbit around Mun. All you have to do now is reach Mun escape velocity, entering Kerbal SOI with a periapsis low enough in the atmosphere to assure reentry. How hard can that be?

You create your maneuver node, wait for the proper time and fire the engines, and then it happens.... before the burn is complete the last drop of life saving fuel is gone. You made escape velocity but your Kerbal periapsis is too high above the atmosphere for it to capture the ship. You are officially lost in space.

Out Of Fuel - That Can't Be Good

Hold on you may not have to abort the mission or revert to launch or VAB. There is a way to rescue poor Jeb that does not require a rendezvous or docking ports. That is, IF you remembered to add RCS thrusters and monopropellant to your ship. If you didn't, there is still a chance but it will involve Jeb doing an EVA and literally pushing the ship using his jet pack. The same basic idea  is involved as detailed here.

Yeah Baby - Thrusters!

I have heard people mention using thrusters to correct an orbit but no one ever explained how they did it. Turns out it is really simple. Here is what to do: From the map view wait until your rocket has escaped the Mun's SOI and is on a trajectory towards Kerbal. The closer to apoapsis you begin this maneuver the easier it will be. Turn your ship to the retrograde marker on the Navball. Make sure you press the 'R' key. This enables RCS thrusters (or the jet pack during EVA). Now when you press the 'H' key it will fire the thrusters towards the bottom of the ship. This will slow down your craft and begin to reduce your periapsis.  

Lower That Periapsis

As long as your periapsis is below the atmosphere and your trajectory is a closed loop, you will eventually gain reentry but you may wait forever as you loop until your orbit decays. If you have the propellant to fire until your periapsis is really low, or better below ground level, you can accomplish reentry pretty quickly.

Final Staging
If you look closely in the up close picture where I am firing the thrusters (3 pics up), you will see I was completely out of fuel. So I had to hang on to the lander stage because the thrusters were mounted on the tank. Now that reentry is imminent, the lander stage is decoupled high in the atmosphere. 

Rentry
I love the flaming glow of reentry. Notice above in the background the lander stage is still visible. 

Safe At Home
When the chute fills with air I know I have brought Jeb back safely. 

By the way, the thruster keys are set up pretty much like the rocket engine keys. Instead of using WASD to change the direction the ship is pointed, you use IJKL to move the entire ship in the direction selected. Not as similarly, while shift increases engine throttle and CTRL decreases throttle, H causes thrusters to move the ship forward and N moves it backwards. In our situation we used H to slow down in retrograde.

I hope this helps you rescue your mission. 


Saturday, April 19, 2014

Tiny Titan

This craft I named Tiny Titan. A better name would have been - What was I thinking? After the success of the AliceK, I was ready to reach further out into space. This was not the ship to make that happen.

Tiny Titan
The lift stage has seven engines that ignite at launch. The outer ring of six have Rockomax Mainsail engines on a Rockomax X200-32 tank and a Rockomax X200-16 tank. I added AV-T1 Winglets for stability. Each engine/tank combo is mounted angled 5 degrees in at the top, for control. This combination of engines uses asparagus staging to drop empty tanks in balanced pairs. The center of the stage is also a Mainsail, Rockomax X200-32 tank with Rockomax X200-16 tank. The outer ring is well strutted to the orbit stage above. A Rockomax Decoupler separates the stages.

The orbit stage is six RT-10 solid boosters on TT-10 radial decouplers. Only two engines fire at a time. As they burn out, the next two ignite. Once they are used the center of the stage lights up the Rockomax Skipper engine mounted under a double stack of Rockomax X200-16 tanks with Advanced Canards added for stability. Another Rockomax Decoupler separates this stage from the remainder of the rocket.

Munar transfer is accomplished with four double stacks of FL-T200 tanks and Rockomax 48-7S engines. The tanks are mounted to girder segments because it looked cool. The tanks are secured with additional struts. The entire structure is ejected by radial decouplers when the tanks are emptied.

The lander/return stage uses a Rockomax X200-8 at top,  with a Rockomax X200-16 at bottom with 6 Rockomax 24-77 engines. Also mounted to this tank are three Batteries, six lights, and six landing struts. The smaller tank above has three radial chutes in case I bring the whole thing home. Above the lander stage is a FL-R1 RCS Fuel Tank and four RV-105 RCS Thruster Blocks.

Another decoupler can be used to separate the lander stage from the Mk1-2 Command Pod which also has three 3x2 solar panels on the sides and a main chute on top.

Tiny Titan on Mun

For all its promise this ship performs very poorly. To avoid exceeding terminal velocity the lift stage needs to be powered down to about 2/3 throttle but doing so really seems to save very little fuel. So why bother? The bigger issue is the orbit stage. By the time the Skipper engine fires the ship is only a few seconds away from apoapsis which is barely at about 53k at this point. Fortunately the Skipper is powerful enough to raise the apoapsis and reach circular orbit. So I guess in reality the stage accomplishes the job. It just isn't pretty.

The transfer stage does exactly what it was intended. So yeah, I did that on purpose. The lander stage also performs well - Go me.

The biggest issue is the lander stage is also the return stage. If you can land without circularizing or changing inclination then liftoff and return without circularizing, because you are Scott Manley, you can return to Kerbin with a little extra fuel. The rest of us are going to run out on the return trip. Even if you do, as long as you are in Kerbin's SOI, you can get home with this ship. In the next post I'll show you how.

Wednesday, April 16, 2014

Revisiting the To The Mun Alice! Series

Previously I presented the To The Mun Alice! series of ships as I originally designed and attempted to land them on Mun. Three months ago, only the last in the series, the AliceK, was able to complete its mission by landing and then returning to Kerbin. In my last post I presented the historic journey of the brave crew of the AliceK as Jebediah raised the Kerbal flag on Mun.

In this post I reexamine the series. Recently, the craft were brought out of storage and sent once again to the launchpad, then sent skyward into the darkness of space. My flying skills while still quite amateurish are much improved over the complete novice abilities of the original flights. The results were interesting. Only the Alice2 was incapable of reaching orbit. The rest of the series surprisingly were all quite competent at completing their original mission of a trip to the surface of Mun and a return back to Kerbin.

To The Mun:

This ship seemed completely under powered at the time.

To The Mun

Today it was really close getting into orbit but worked flawlessly once orbit was established.

To The Mun - Landed


Alice:

Too much power, too little struts, with too little experience, resulted in one big boom.

Alice

Now, learning to use the throttle made a big difference. Look Ma I'm on the Mun.

Alice In Wonderland

A beautiful picture of the return burn.

Alice Leaving Mun


The Alice2:

This craft simply did not have the right stuff and never will.

Alice2


The Alice3

This is another craft that I originally could not put into orbit.

The Alice3

Turns out, if you are patient and work at getting horizontal speed as well as vertical, this rocket will eventually climb into orbit and perform beautifully. The transfer burn to Mun is pictured below.

Alice3 Transfer

A cool picture of the Alice3 in Munar Orbit

Alice3 In Orbit

KSP.... Uhmmm.... We have a problem. Yes, even today I turn one over from time to time. The point is, this craft had plenty of fuel and would have made the return trip just fine. If only....

Alice3 - Not Good


The AliceC

A heavy metal monster for sure. This should have made it big. Trouble is I couldn't control it.

The AliceC
Today this Billion Dollar Baby cut its way through the atmosphere like a knife. 
Not like in the hands of a surgeon. More like a crazed psycho killer.

AliceC Rocking The Landing

After losing the lander engines, the AliceC coasts in orbit around Mun.

AliceC Back In Munar Orbit

Once solar panels are extend the Alice3 heads for Kerbin.

AliceC Heading Home

Remember to save your craft files with each new series, especially if you thought it should have worked. I really enjoyed coming back months later with more experience and flying these ships. It is a good feeling to learn you were on the right track with your design ideas.

Tuesday, April 15, 2014

AliceK - It's Historic Journey

On 01/09/2014 history was made as the AliceK left the Kerbal Space Center for Mun. On board were Jebediah Kermin, Bill Kermin, and Bob Kermin. Join us now as we relive this game changing moment in time.

Below is the AliceK, an over designed, more boosters, monster of a craft that rocketed our heroes into history.

The AliceK

The launch was flawless as the 4 mainsail engines lit up.  

We Have Liftoff

Jeb reported the ship was difficult to control as it wobbled during the early ascent.
At 7k it evened out and reaching 200 m/s the AliceK began its gravity turn.

Gravity Turn

The outer orange tanks were jettisoned after they were exhausted.
The center Mainsail continued to burn with a full tank thanks to asparagus staging.

Dropping Outer Tanks

Once emptied the orange tank fell back to Kerbin, while the ship continued to burn towards orbit.

Orange Away!

Once an apoapsis of 80k was established the engines were cut and the AliceK continued to climb.

Drifting To Circularization

While drifting to apoapsis, the circularization burn maneuver node was plotted.

Circularizing Node Created

Once the burn was completed a nearly circular orbit was established.
Amazing. How often does that happen?

Circularization Complete 

Mid way through the transfer burn to Mun, the orbit stage burned its last fuel and was ejected.
The transfer stage completed the burn as planned.  

Transfer Stage Ejected

In this picture you see Kerbin to the left and Mun to the right as the transfer stage continues to burn.
This stage would later set a periapsis at 15k and circularize around Mun before being ejected.

Burning Toward Mun

And the moment history was made. The six landing struts held the craft solidly on Mun.

Touchdown

The landing site was chosen for no better reason than so this picture could be taken with Kerbin low on the horizon. Jeb reportedly stood silent to remember the many previous missions that had gone before, most with horrible endings, to make this historic moment possible. 

AliceK Flag On Mun

Once Jeb was aboard the AliceK, it left Mun to establish a 15k orbit. As the ship began its climb the landing engines were emptied and jettisoned. The return stage took over and performed its duties flawlessly.

Returning from Mun

With the return stage, orbit was circularized around Kerbin at 150K. KSP was targeted and reentry began.

Reentry

The ship was designed to eject the transfer stage allowing the command pod to glide down with only the chute. Jebediah thought, since there was a few drops of fuel left in the tank, he would use the engine to make a spectacular landing. 

Chutes and Contrail

And this is what happens when you try to show off. The rocket touched down on the sloping concrete of the tarmac and slowly tipped over. No one was injured (well Jeb's ego was a little bruised). Bill and Bob thought it was cool. Notice the launch stabilization enhancers are still in place and visible on the launchpad.

Nice Finish

This moment in history was brought to you by the letter K and the numbers 3-2-1.

When did you first complete a Mun landing and return? I'd enjoy hearing your story.